National Patrol Camp XI 2024
Guide to Cooking in Camp, Recipes & Tips
Discover essential basic recipes, delicious recipes, and expert tips to enhance your cooking experience and ensure food safety.
🧑🏻🍳 Meal Times
Ready to cook? Find out your meal times below
| Meal | Collection | Return |
|---|---|---|
| Breakfast | 7AM | 8AM |
| Lunch | 11AM | 1PM |
| Dinner | 5PM | 7PM |
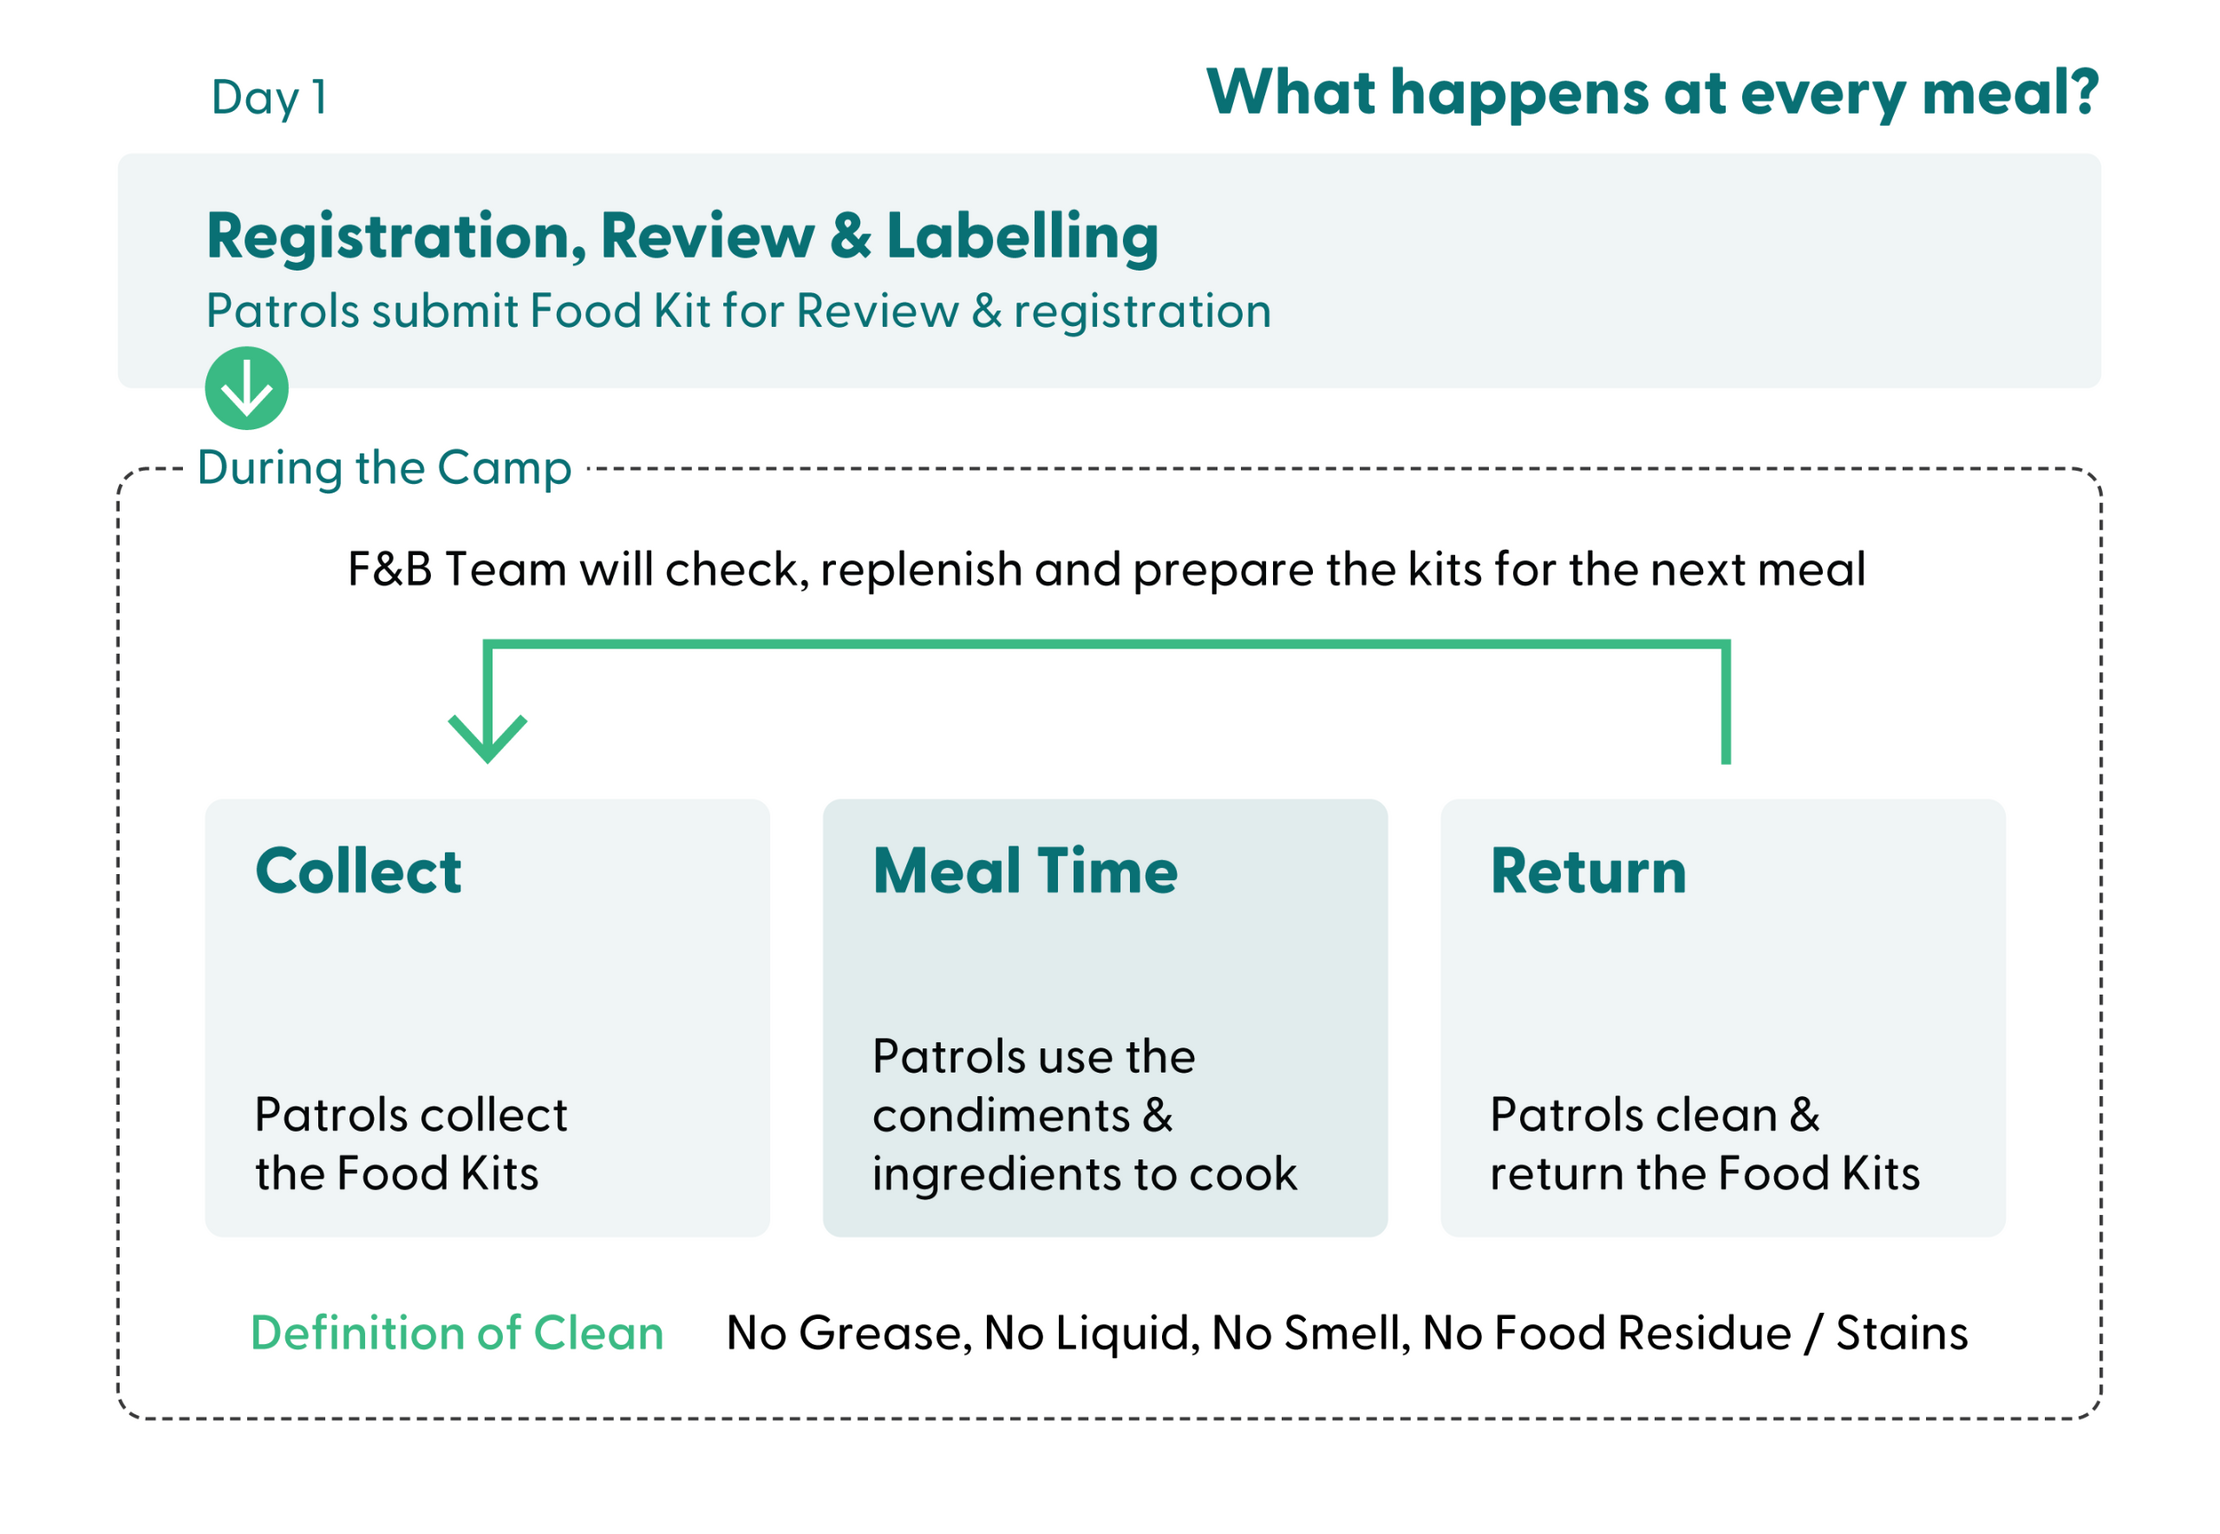
⬇️ Collection & Return of Food Kits
All collections and return of Food Kits will be held at the Main Dining Hall / Admin Block.To allow for a smoother process, all patrols are to adhere to the following staggered timings.
| Area | Collection Time |
|---|---|
| North & West | +15 minutes from stated time (i.e. Lunch is 11AM collection, patrols come at 11.15AM) |
| South & East | At stated time |
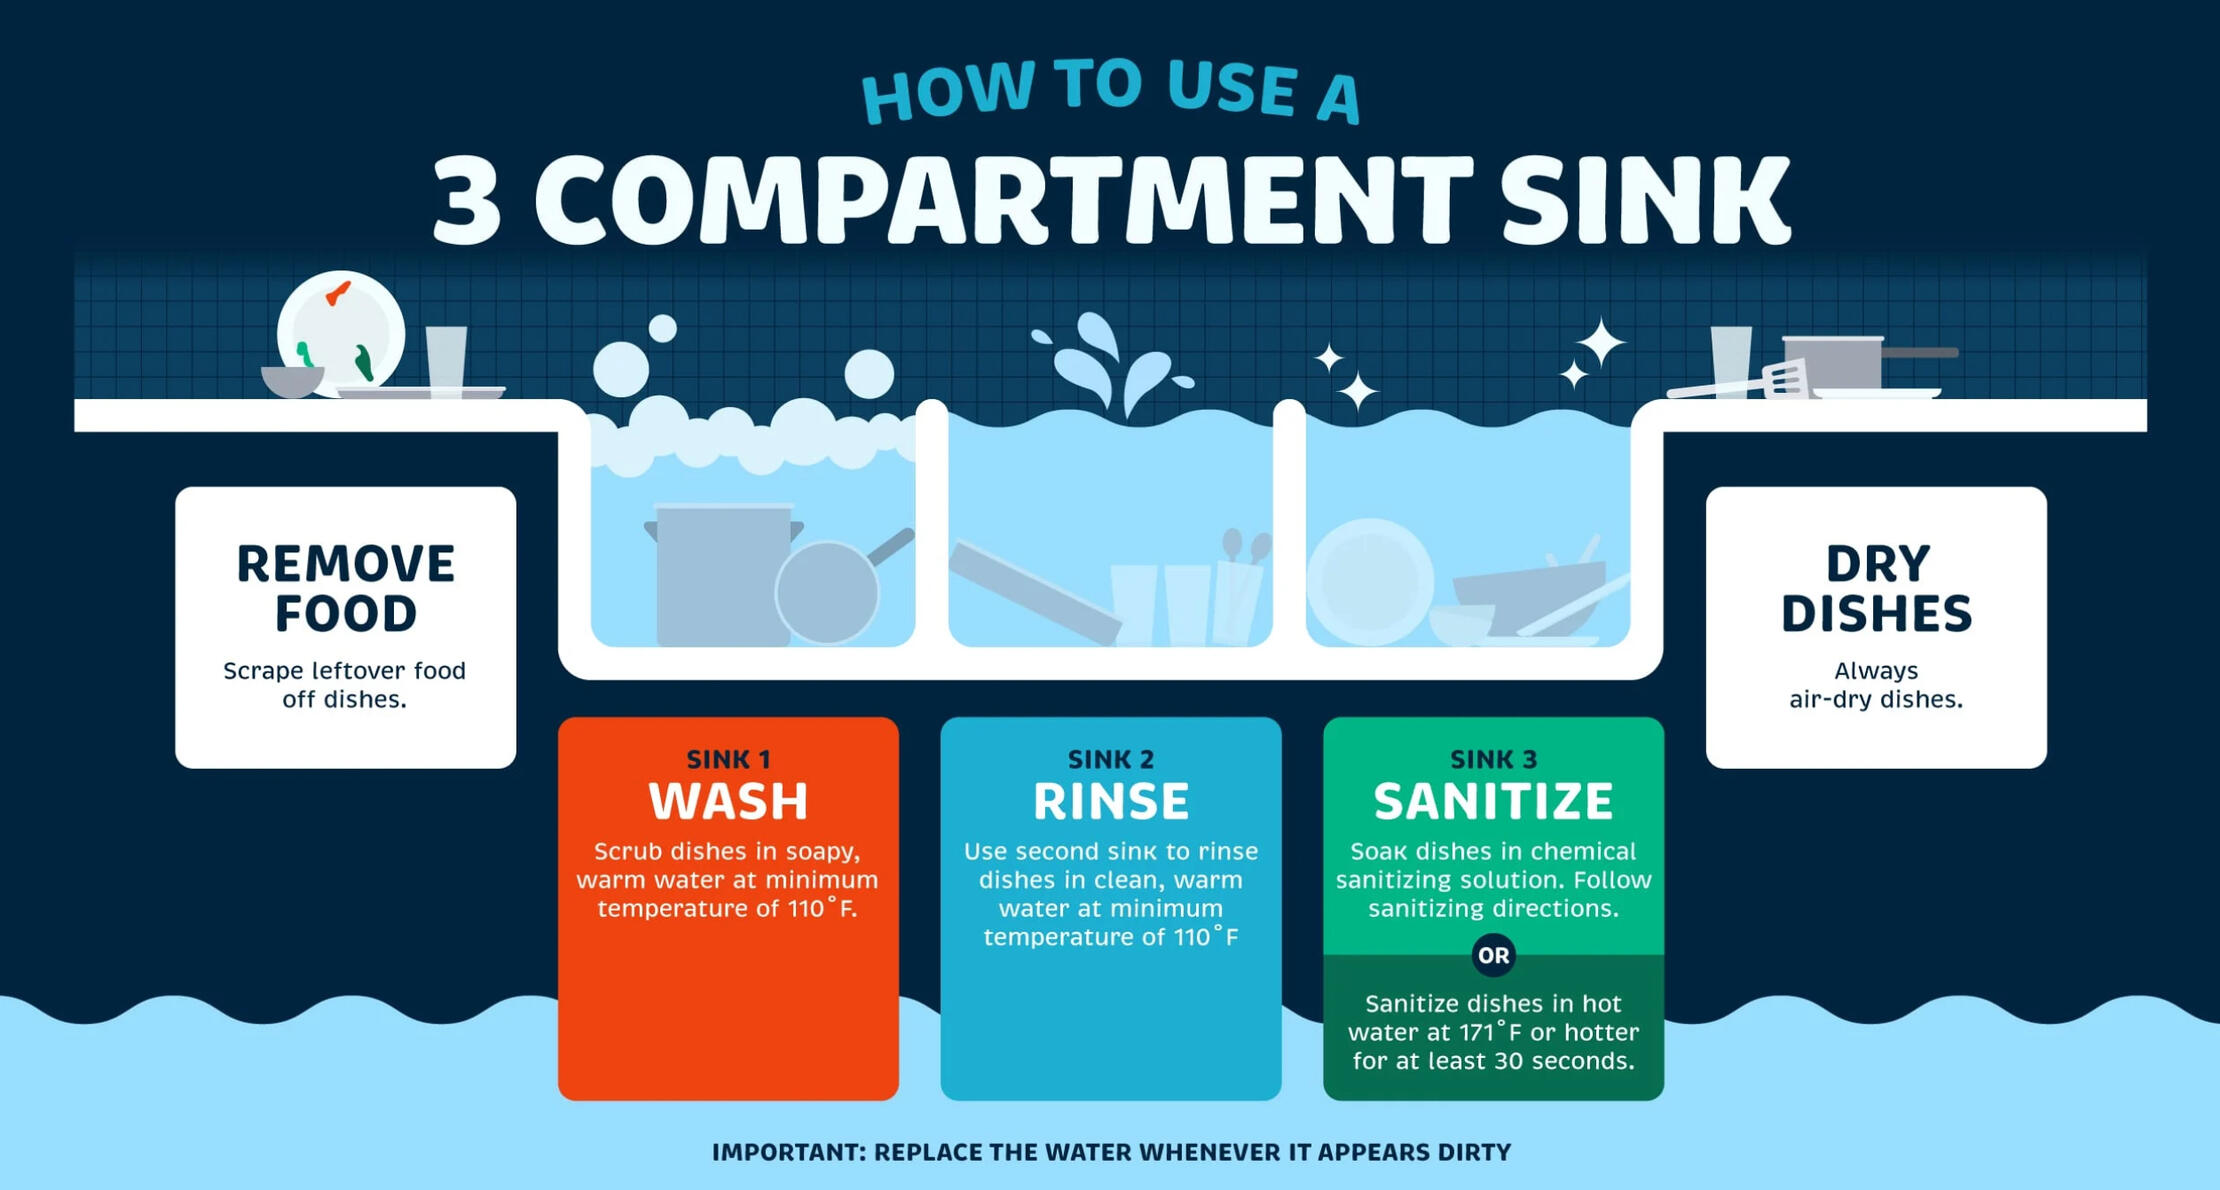
🧽 Washing Method
Please take note of the washing method. Your cooperation is greatly appreciated 🙏🏻🙏🏻🙏🏻
| Area | Washing Area |
|---|---|
| North & West | Main Kitchen / Field Kitchen |
| South & East | STI / Field Kitchen |
Before washing, please separate all wastes as per the table below.
| Type | Destination |
|---|---|
| Liquids except for >100ml Oil | Sink |
| Liquids of >100ml Oil | Seal in plastic bag and dispose in Trash bin indicated Food Waste |
| Food Waste | Trash bin indicated Food Waste |
| Wrappers, Plastic, Cardboard | Trash bin indicated Packaging Only |
Important Information for all Campers
🍔 Food Kits
All Food Kits must be clearly labelled with your unit & patrol number
Food Kits must return clean, dry and grease-free
Food Kits that are unclean will be refused at return
🥬 Dietary
Participants with allergies or dietary requirements are to sound out during collection and inform your patrol leader
Vegetarians may receive substitute ingredients in some meals.
🧺 Surplus Policy
Patrols are to use all ingredients to the fullest extent
Please be reminded that only Fresh Ingredients can be returned.
© 2024 National Patrol Camp. Image rights to its respective owners. Designed for Mobile. Made with ❤️
Basics
Operating a Butane Gas Stove
Before Using
Inspect the Butane Fuel Canister for any signs of damage (large dents, punctures, holes).
Inspect the Butane Fuel Camp Stove for any indication of damage
Ensure the stove is away from any source of open fire
Place on a level surface where the stove will not tip over.
Steps
1. Ensuring that the dial is at the off position, open the Butane Cartridge Compartment.
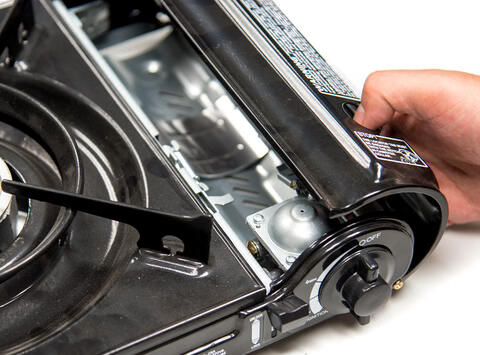
2. Locate the latch stove and line it up with the gap on the canister.
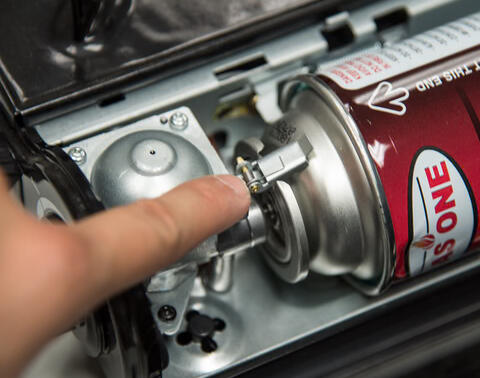
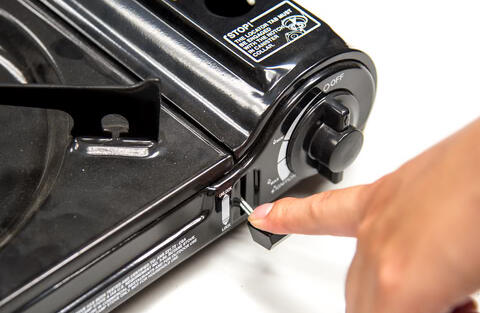
3. Close the Butane Cartridge Compartment and press down on the lock lever
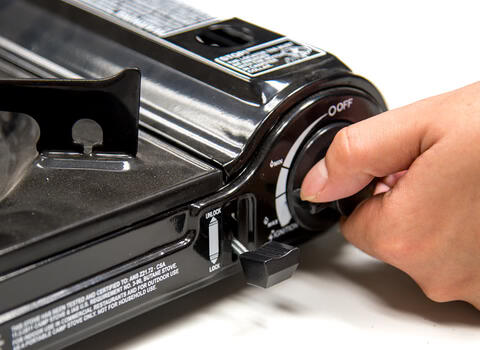
4. Turn the dial clockwise until you hear a "click". Adjust the flame to your needs by tuning the dial.
Steamed White Rice
You'll need
1 cup White rice (200g)
2 cup Water (480ml)
Steps
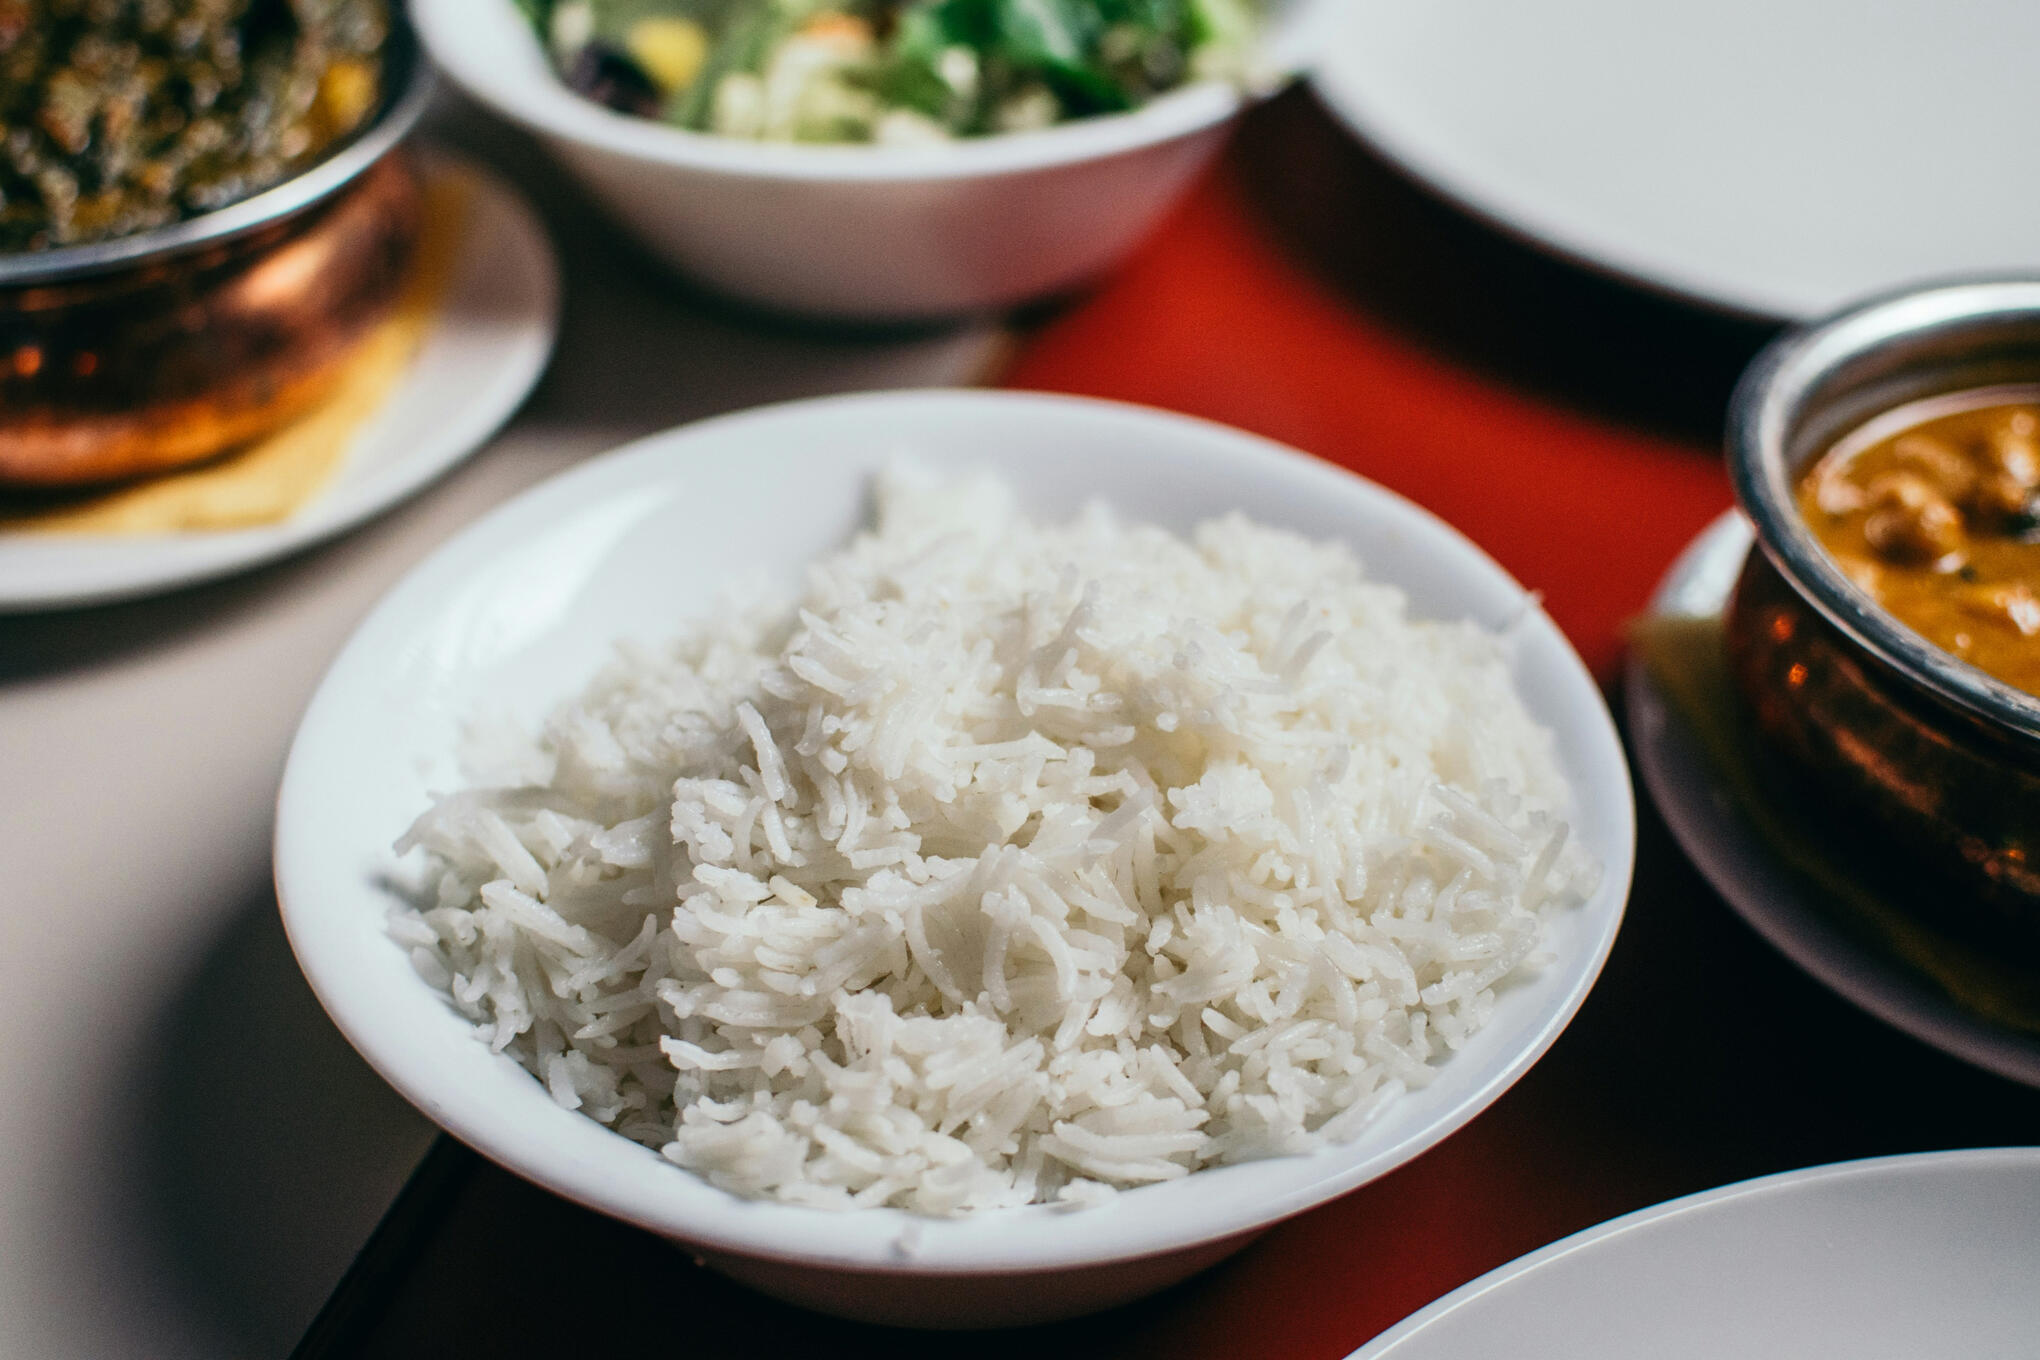
Add rice and water to a medium saucepan and bring to a boil over high heat. Once boiling, lower heat to a simmer and cover. Ensure it’s simmering and not boiling or the rice can cook too quickly.
Simmer until water is completely absorbed and rice is tender – about 15-25 minutes
Turn off the heat, remove the lid, fluff with a fork, put the lid back on, and let rest for 10 minutes.
Serve immediately
Resources
Here are some resources for your reference
Cooking Tips For Kitchen Beginners | Epicurious 101
14 Cooking Methods for Beginners | Vil and Zoe's Galley
Basic Knife Skills | Tasty
Main ASIAN SAUCES - Cooking Basics
How to Stir Fry Any Vegetable - Three Basic Flavors and Recipes
Outdoor Cooking | Jamie Oliver
Camp Cooking with Scouts Canada
Campfire Bread On A Stick
Brilliant Camping Food Hacks
Recipes
Explore some recipes you may use during the camp! Please note that ingredients may not be the same as what you'll be receiving
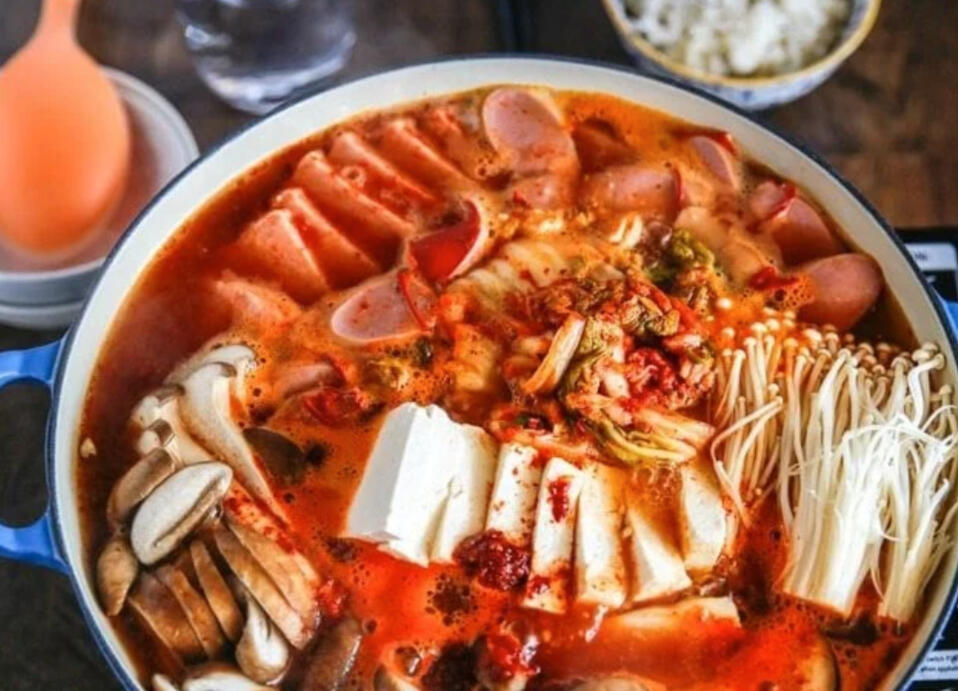
Budae Jjigae
Korean Army Stew
Time: 30 minutes, 8 Servings
You'll need
1L Chicken Stock
340g Luncheon meat, sliced
8 Sausages, diagonally sliced
300g Silken Tofu, sliced
200g Enoki mushrooms
400g Shitake mushrooms
400g Kimchi
8 servings instant ramen noodles
120 g Korean rice cakes for soup
240g Bok Choy
4 slice cheese
8 Eggs
Sauce
4 Tbsp Korean chili flakes
2 Tbsp soy sauce
1 Tbsp sugar
45g Korean chilli paste
Few sprinkles ground black pepper
Steps Link
Assemble the main ingredients (except for instant ramen noodles, rice cakes, green onion and cheese) in a shallow pot. Add the sauce in the middle.
Pour the stock in the corner of the pot. Close the lid and boil it on medium high heat until the stock starts to boil (about 8 mins).
Add the remaining ingredients – instant ramen noodles, rice cakes, green onion and cheese on top of the pot and boil uncovered until the noodles are cooked (about 2 to 3 mins).
Reduce the heat to low (if you’re cooking on a portable burner and sharing the food at the dining table).
Serve
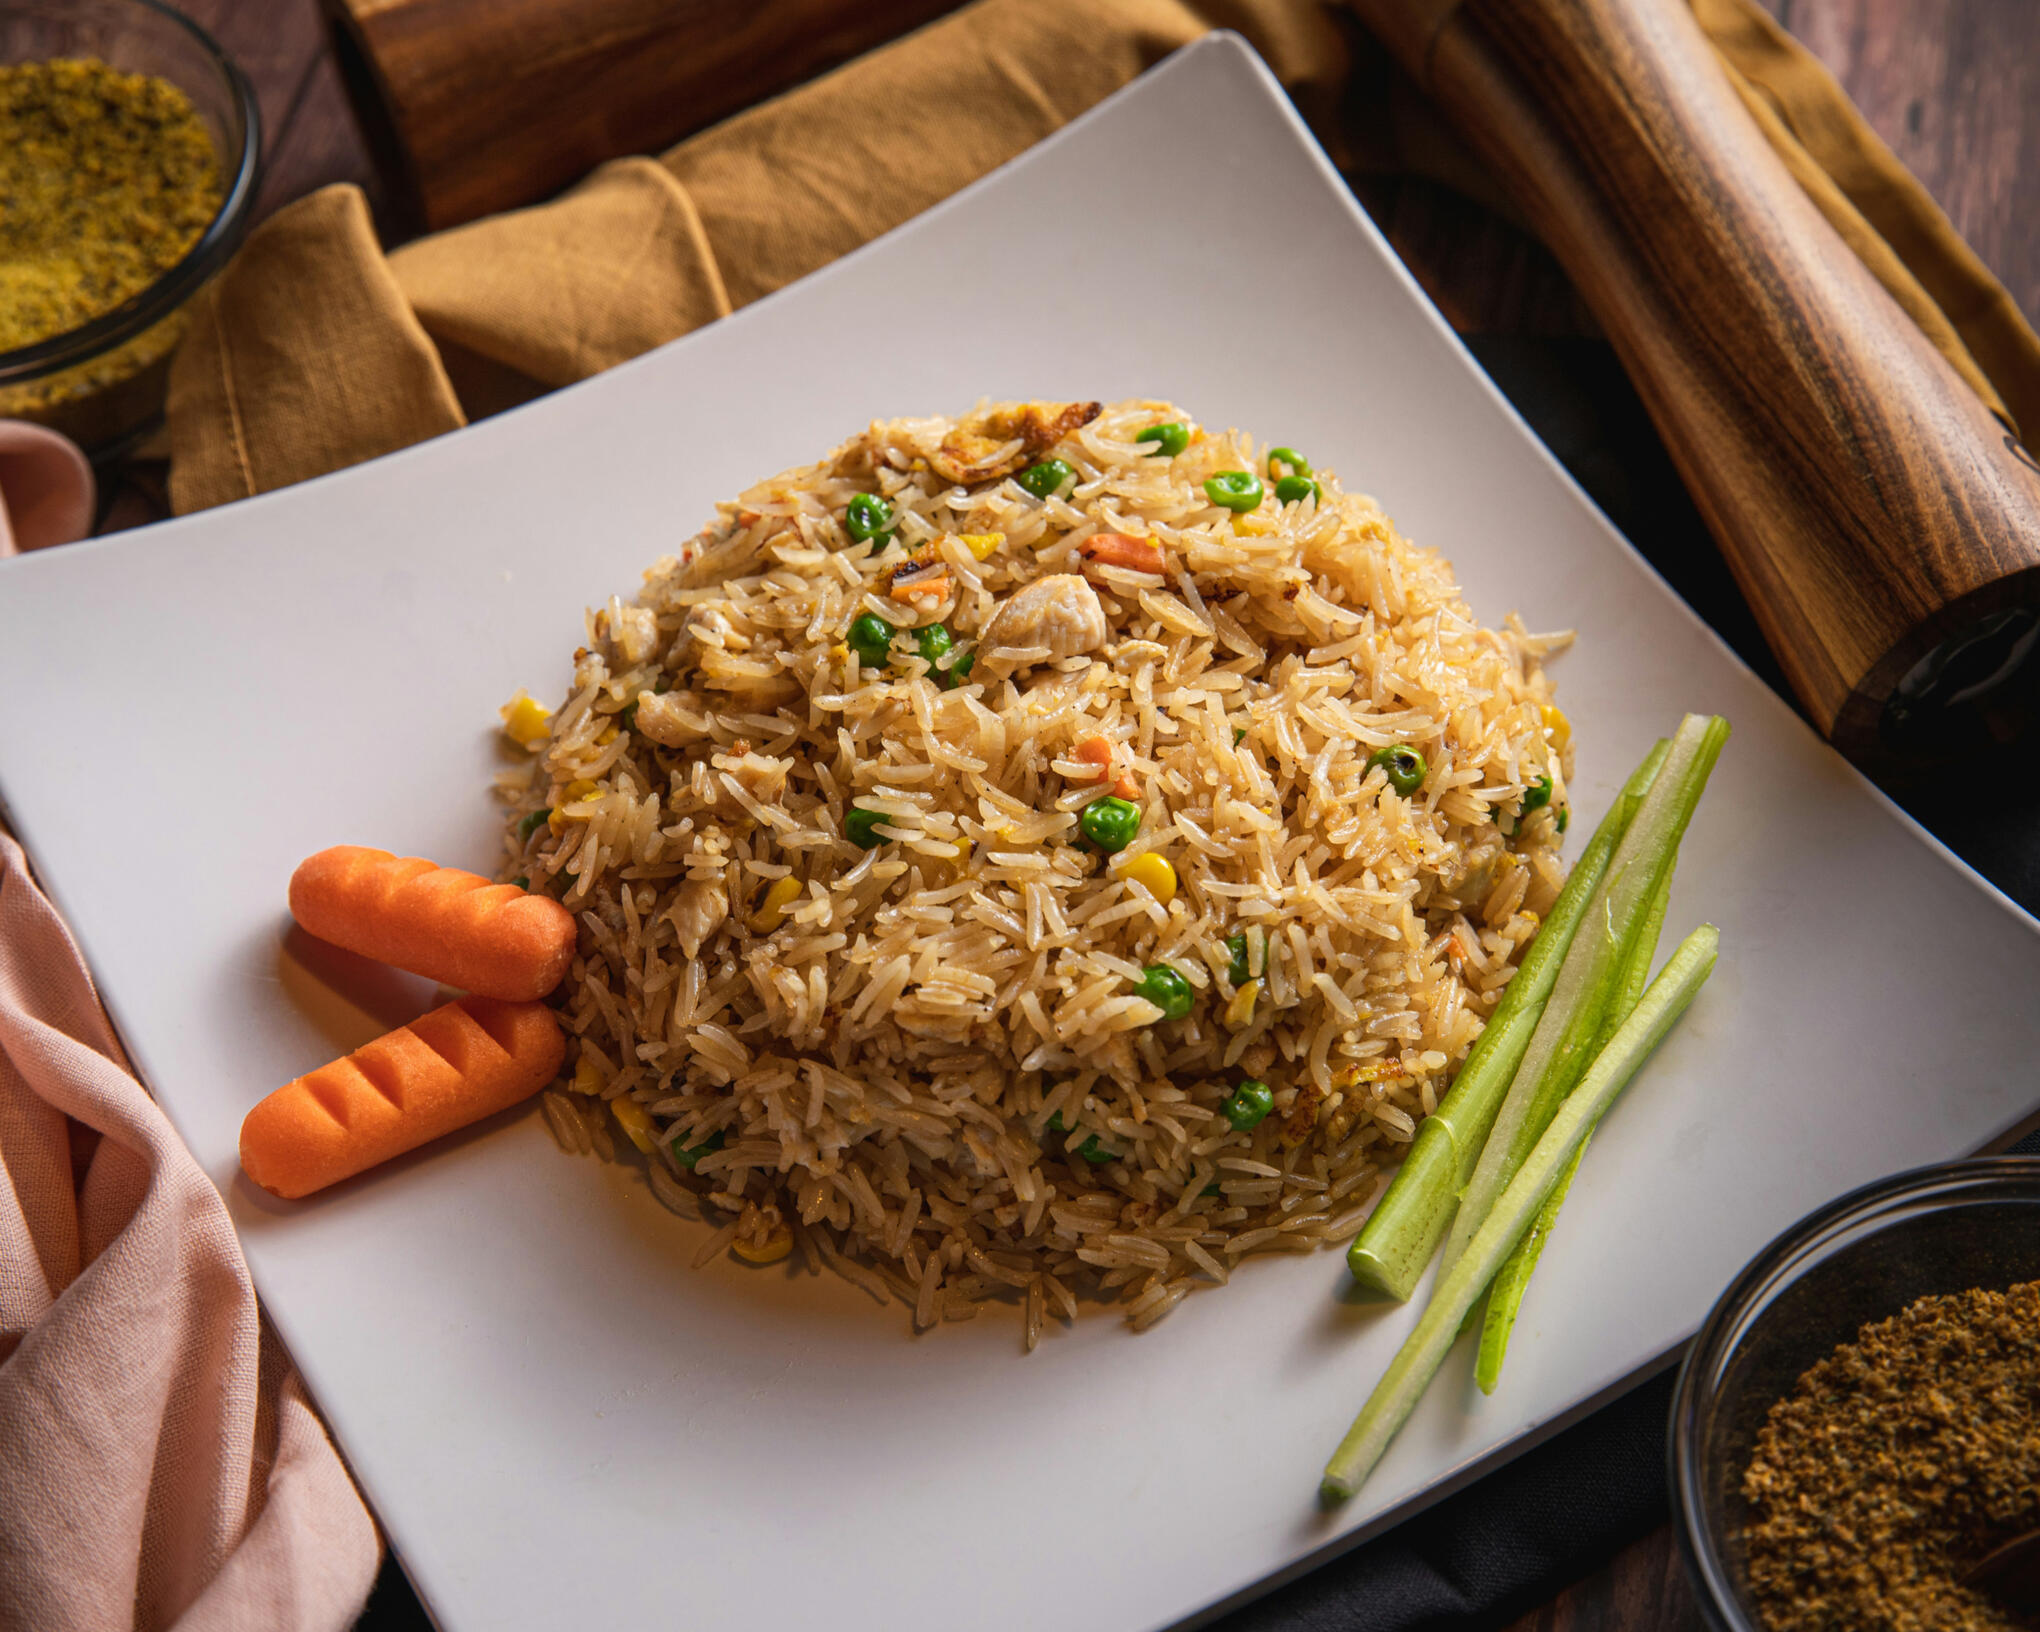
Garlic Fried Rice
520g Uncooked White Rice, cooked
50g garlic (50% minced, 50% sliced)
520g Frozen mixed vegetables
1kg Boneless Chicken Leg
For Marinate
Enough Soy Sauce
Enough Sesame oil
Enough White pepper
Steps Link
Cook enough rice. While cooking the rice, cut and marinate the Chicken
Add 2 Tbsp extra virgin olive oil and the thinly sliced garlic pieces to a large frying pan over medium-high heat
Slowly fry the garlic slices until golden brown. If you add them to hot oil, they will cook too fast and you may end up with burnt garlic slices. Transfer to a dish lined with paper towel. Keep the garlic-infused oil in the pan.
Add the minced garlic to the same pan and stir-fry until golden brown and fragrant.
Add 14 g unsalted butter and swirl around to coat the pan. Then, add the steamed rice.
Once the rice is well coated in the garlic oil, add 1 tsp soy sauce and toss to coat the rice.
Season with salt and freshly ground black pepper. Taste the rice and make sure it is seasoned to your liking.
Serve
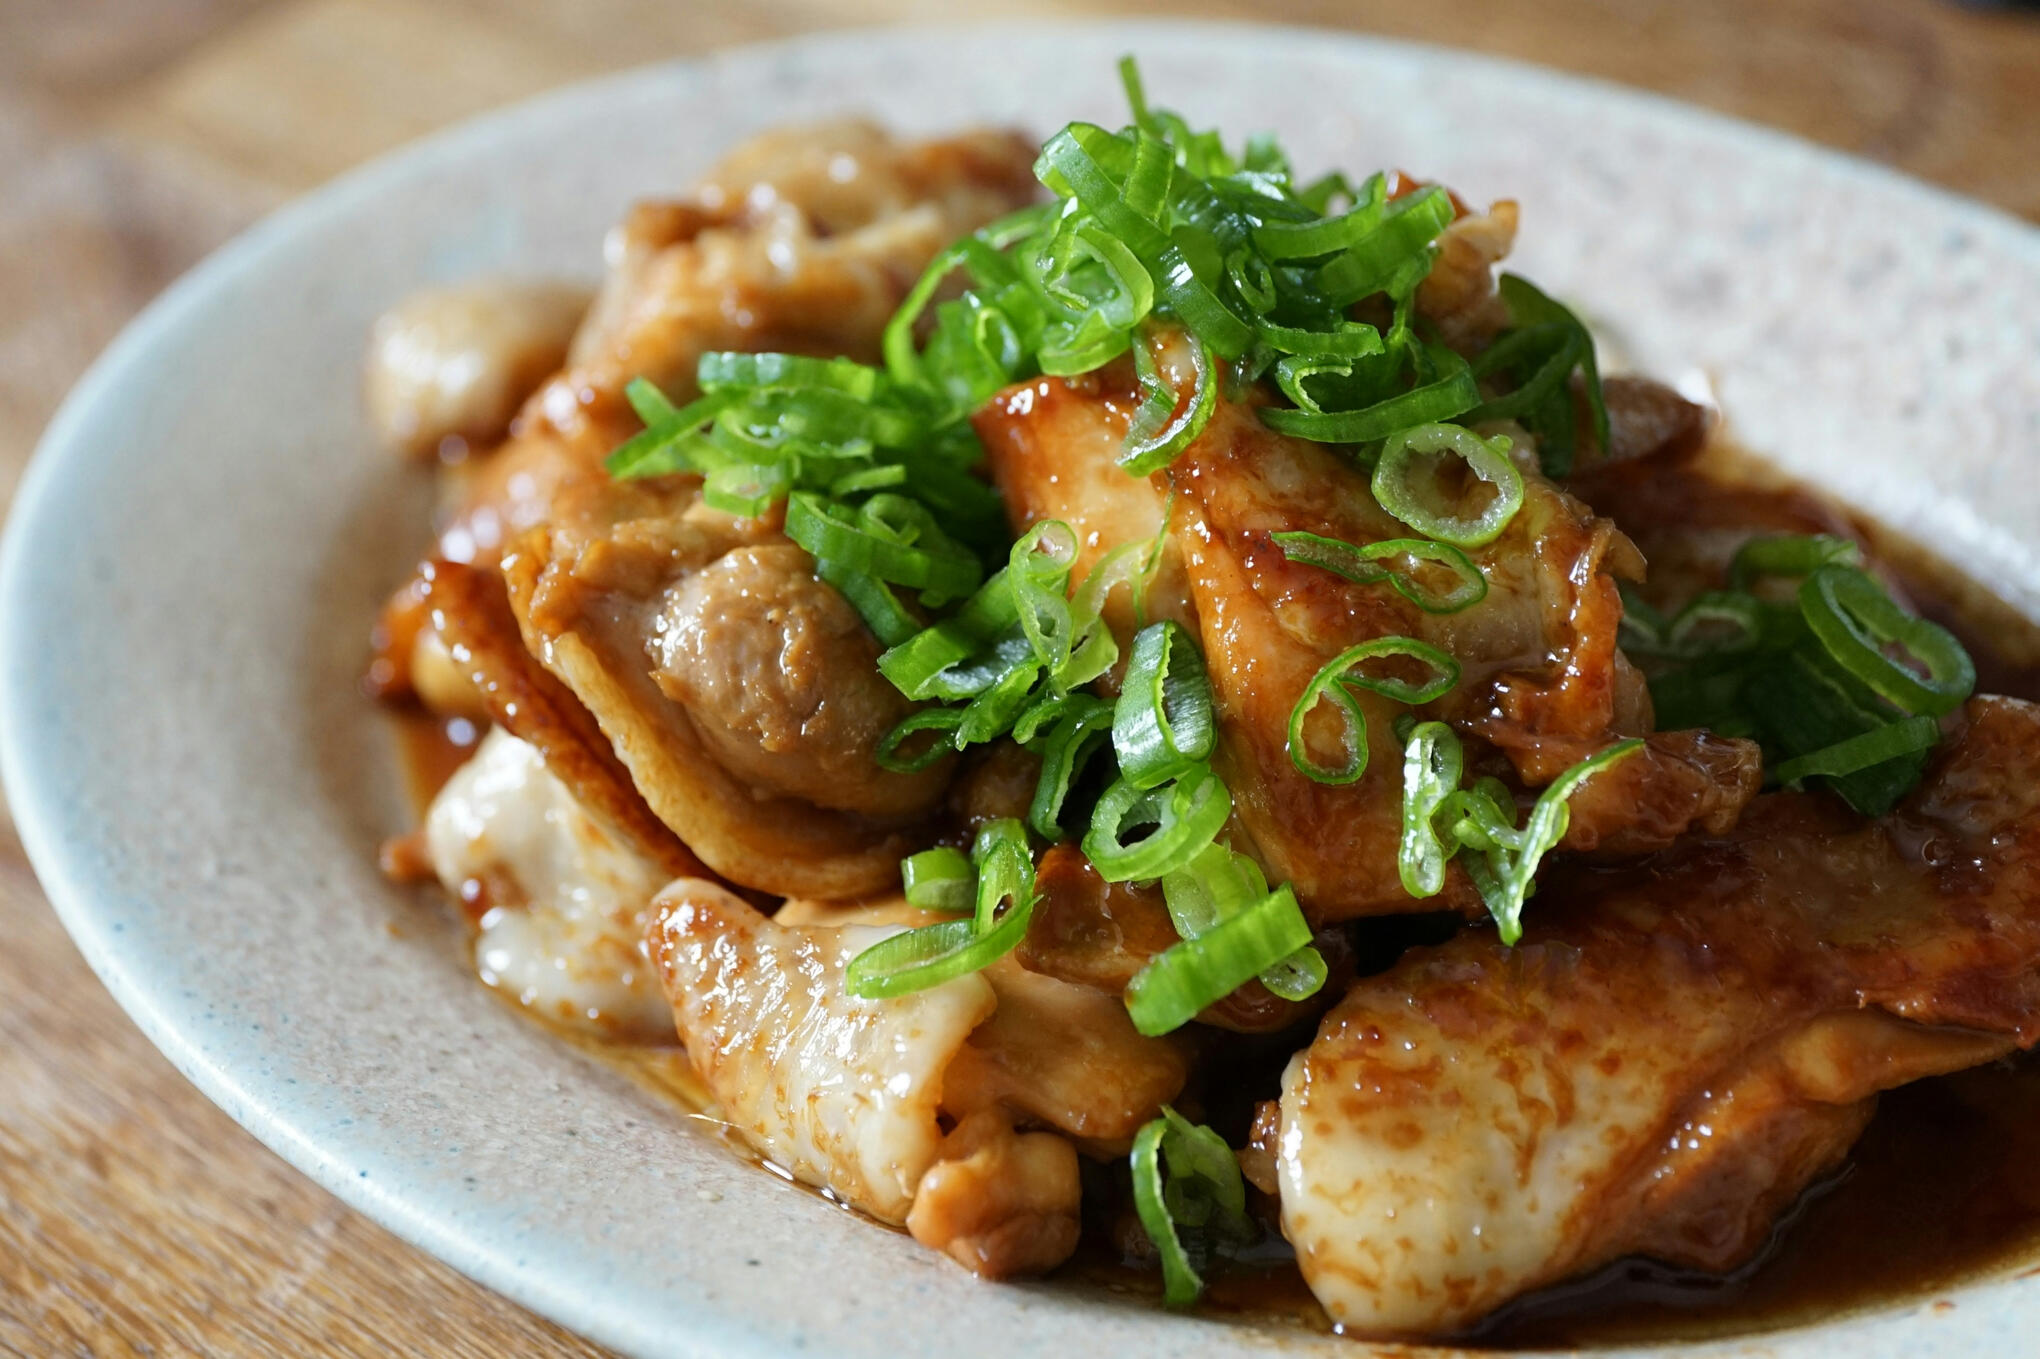
Teriyaki Chicken
2 Parts Soy Sauce: 1 Part Sugar
120ml Soy Sauce
60g White Sugar
1KG Chicken Leg Thigh
Steps
Prepare the chicken by slicing it diagonally
Assemble the marinate and place chicken into a large bowl. Marinate for a minimum of 15-30 mins
On a pan, drizzle oil and pan-fry the chicken until fully cook, or until the internal temperature is 75C
Serve with rice or as a side dish.
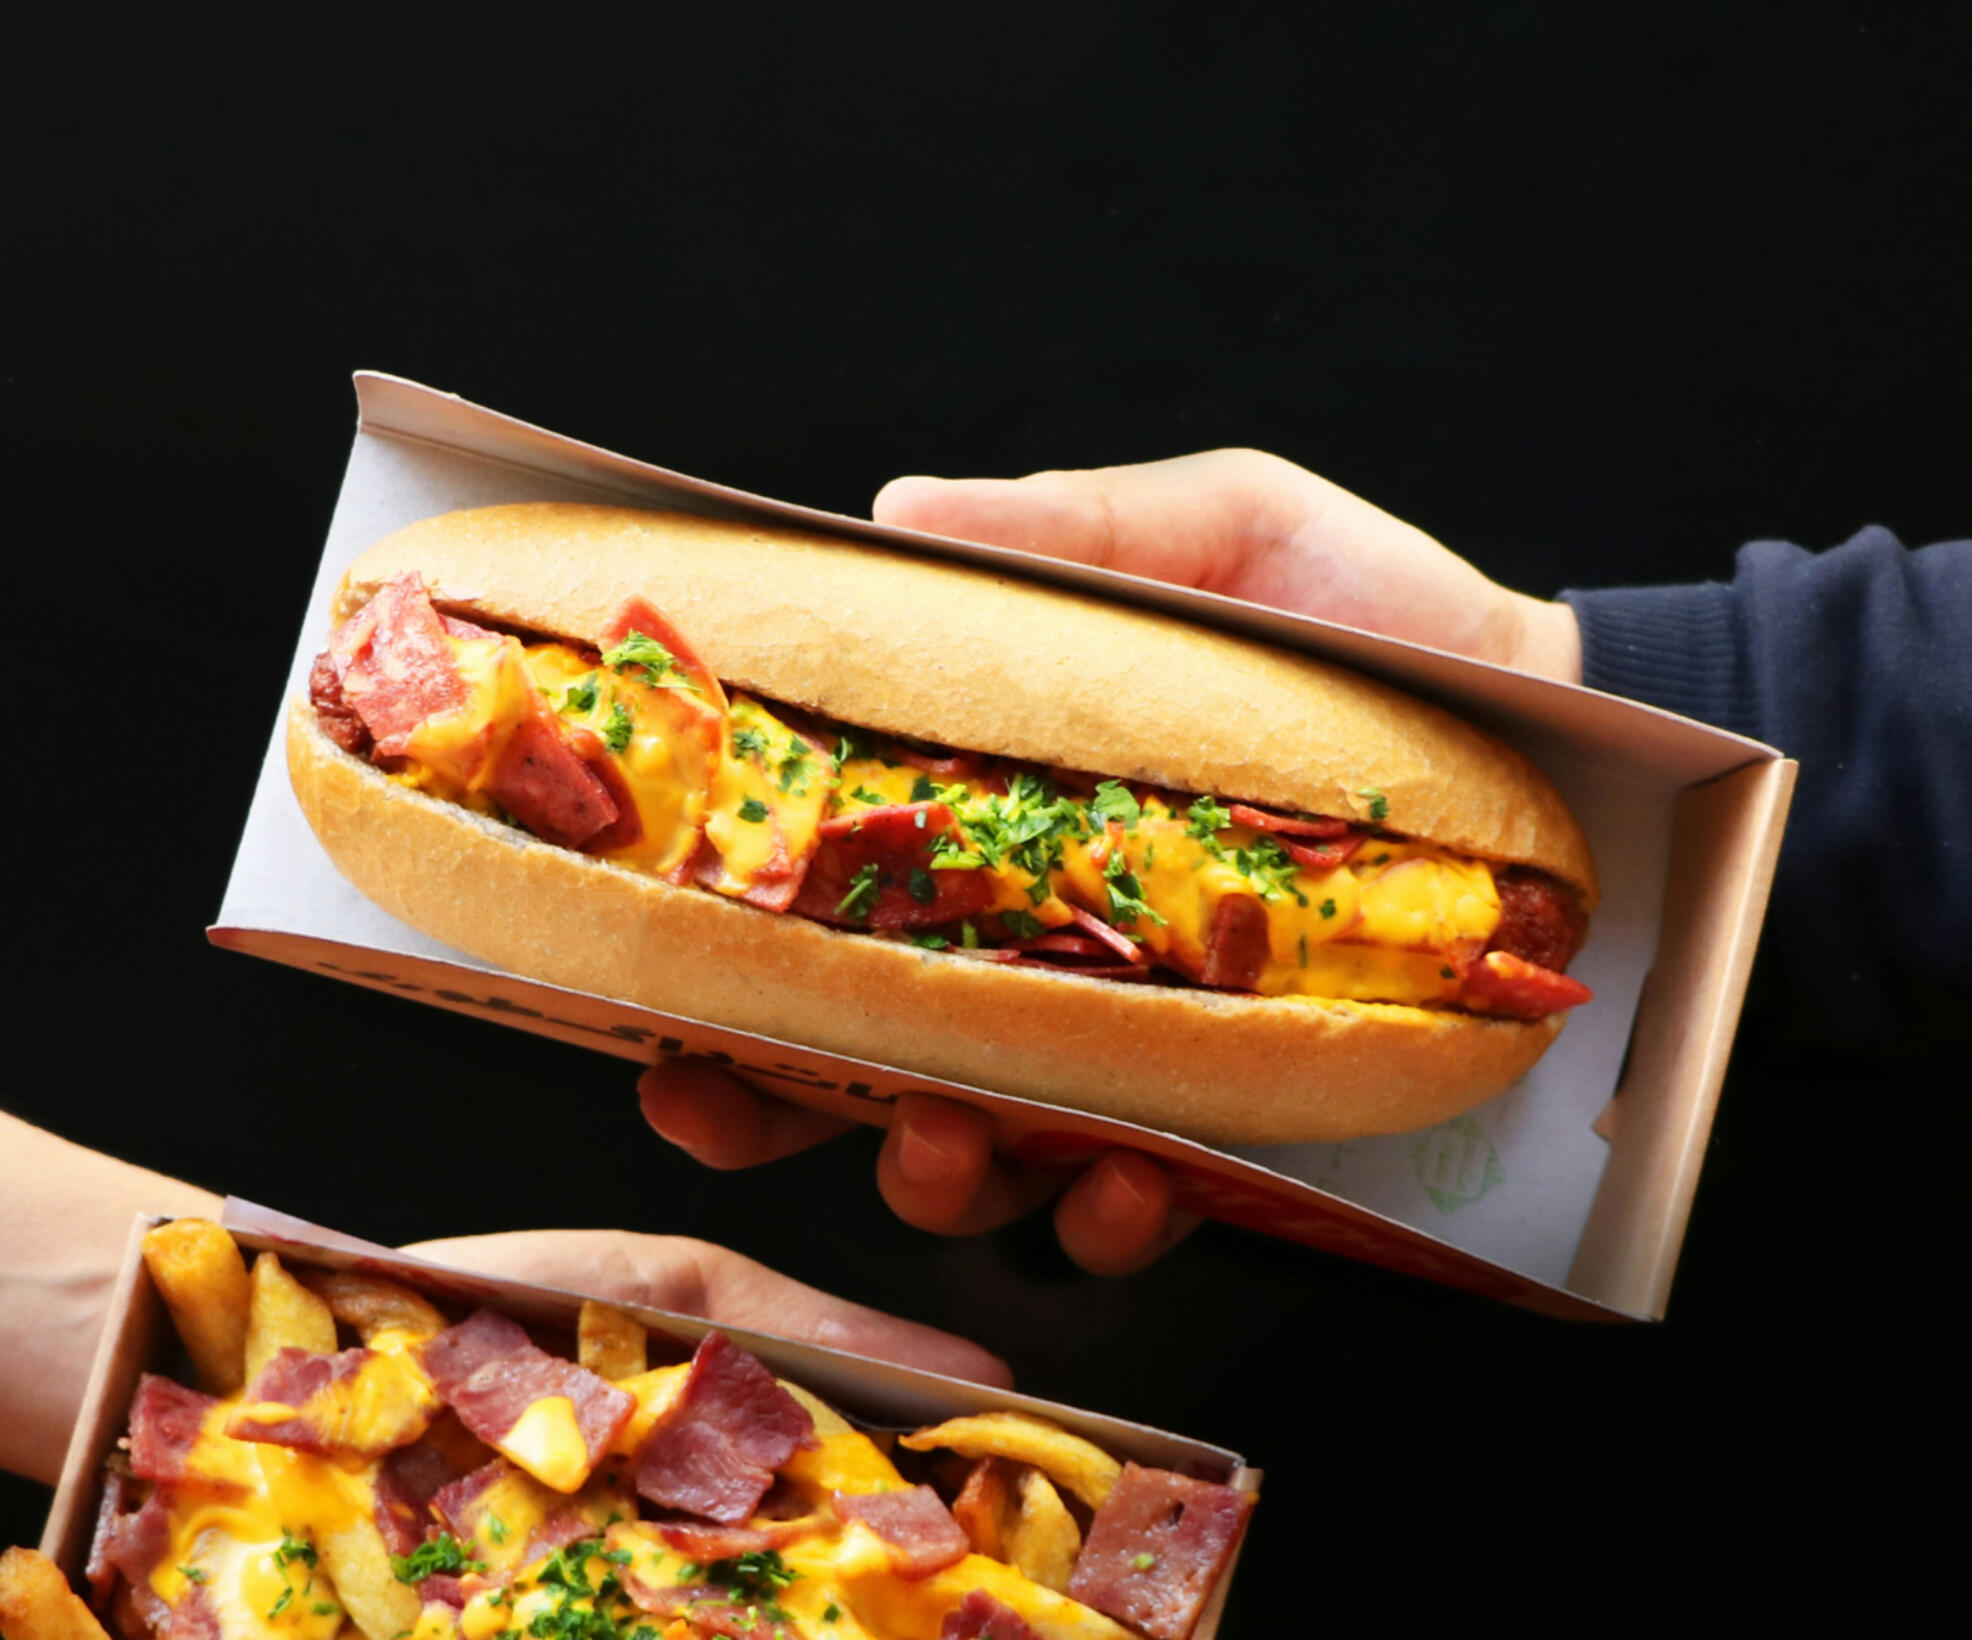
Hot Dog Bun with Scrambled Eggs
You'll need
8 Hot Dog Buns
8 Chicken Franks
8 Whole eggs
Some Butter
Salt & Pepper
Steps
Prepare the Sausages
In a pan over medium heat, cook the Halal chicken sausages until browned and heated through, about 5–7 minutes.
Remove from heat and set aside.
Scramble the Eggs
In a bowl, crack the eggs and whisk them until the whites and yolks are fully combined.
Season the eggs with black pepper to taste.
In a non-stick pan, add 1–2 squares of Unsalted Butter. Let it melt over medium-low heat.
Pour in the eggs and cook, stirring gently to form soft, creamy curds, about 3–4 minutes, or until they reach your desired consistency.
Assemble the Hot Dog Bun
To Finish
Toast the hot dog buns lightly if desired.
Place a cooked chicken sausage inside each hot dog bun.
Spoon the scrambled eggs on top of the sausage.
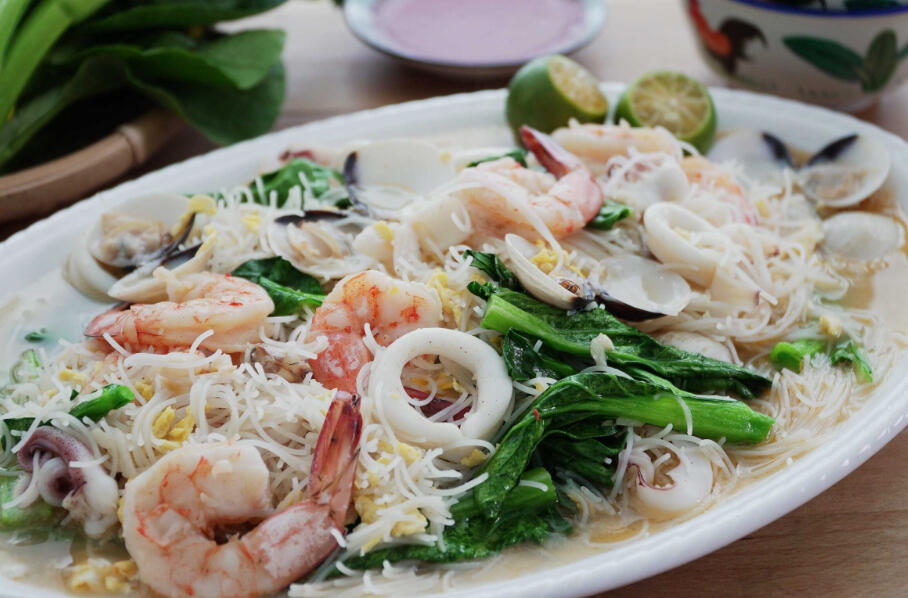
Seafood White Bee Hoon
You'll need
Rice Vermicelli
Whole Eggs
Peeled Garlic
Chicken Stock
Bok Choy
Carrot
Oyster Mushroom
Squid
Prawn
Chicken Breast
Steps
Initial Preparation
Soak the rice vermicelli noodles in water until softened (about 10 mins)
Drain off water and set the soaked bee hoon aside while you prepare other things
Food Preparation
Bring a pot of water to boil and add stock cubes
Preheat your skillet/wok until hot. Add the presoaked bee hoon. Drizzle with about 2 Tbsp of oil on the side and cook for about 1 minute and then flip over and cook another minute and then remove from the wok
Add another 1 Tbsp of oil. Add the shrimp and squid (if using) and stir fry until they just barely turn pink. Don't overcook them. Dish them out and set aside
Add the rest of the oil. Saute garlic for about 30 seconds, push it aside and then add eggs and let them cook undisturbed for about 30 seconds and then start scramble them until about 80 % cooked, so they are still a bit wet.
Pour the stock and bring it to a boil. Then add the bee hoon and seasonings and cover. Let it cook until the bee hoon just started to get soften. I used thin bee hoon so I don't want to over cook it, about 1 minute.
Uncover and then I add the vegetables and cover and let it cook for another minute.
Add the shrimp back. Stir to combine. Have a taste and adjust seasoning as needed.
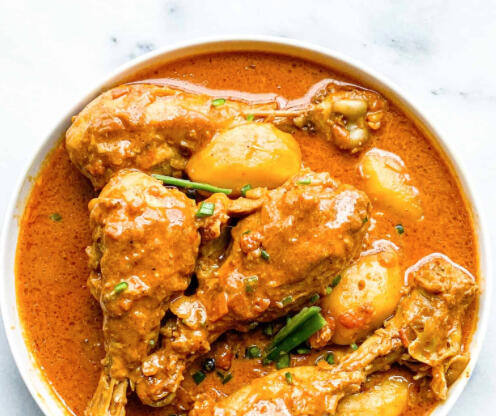
Chicken Curry
You'll need
Chicken Curry Paste 200G
Chicken Mid Joint Wing
Russet Potatoes
Tofu Puff
Coconut Cream 200ML
Eggplant
Steps
Initial Preparation
Boil water in a pot
Using ¼ (50g) of the Curry Paste, pre-season the chicken by rubbing the paste onto the chicken
Food Preparation
Fry onion and add choice of meat to sear. After 3-5 minutes, add rest of vegetables
Add Chicken Curry Paste and stir to combine. Add boiling water and simmer
Once chicken and vegetables are cooked, reduce heat and add coconut cream. Stir to combine.
After 10-15 minutes, give it a final stir and serve.
Note: Boiling curry with coconut cream will cause the curry to separate.
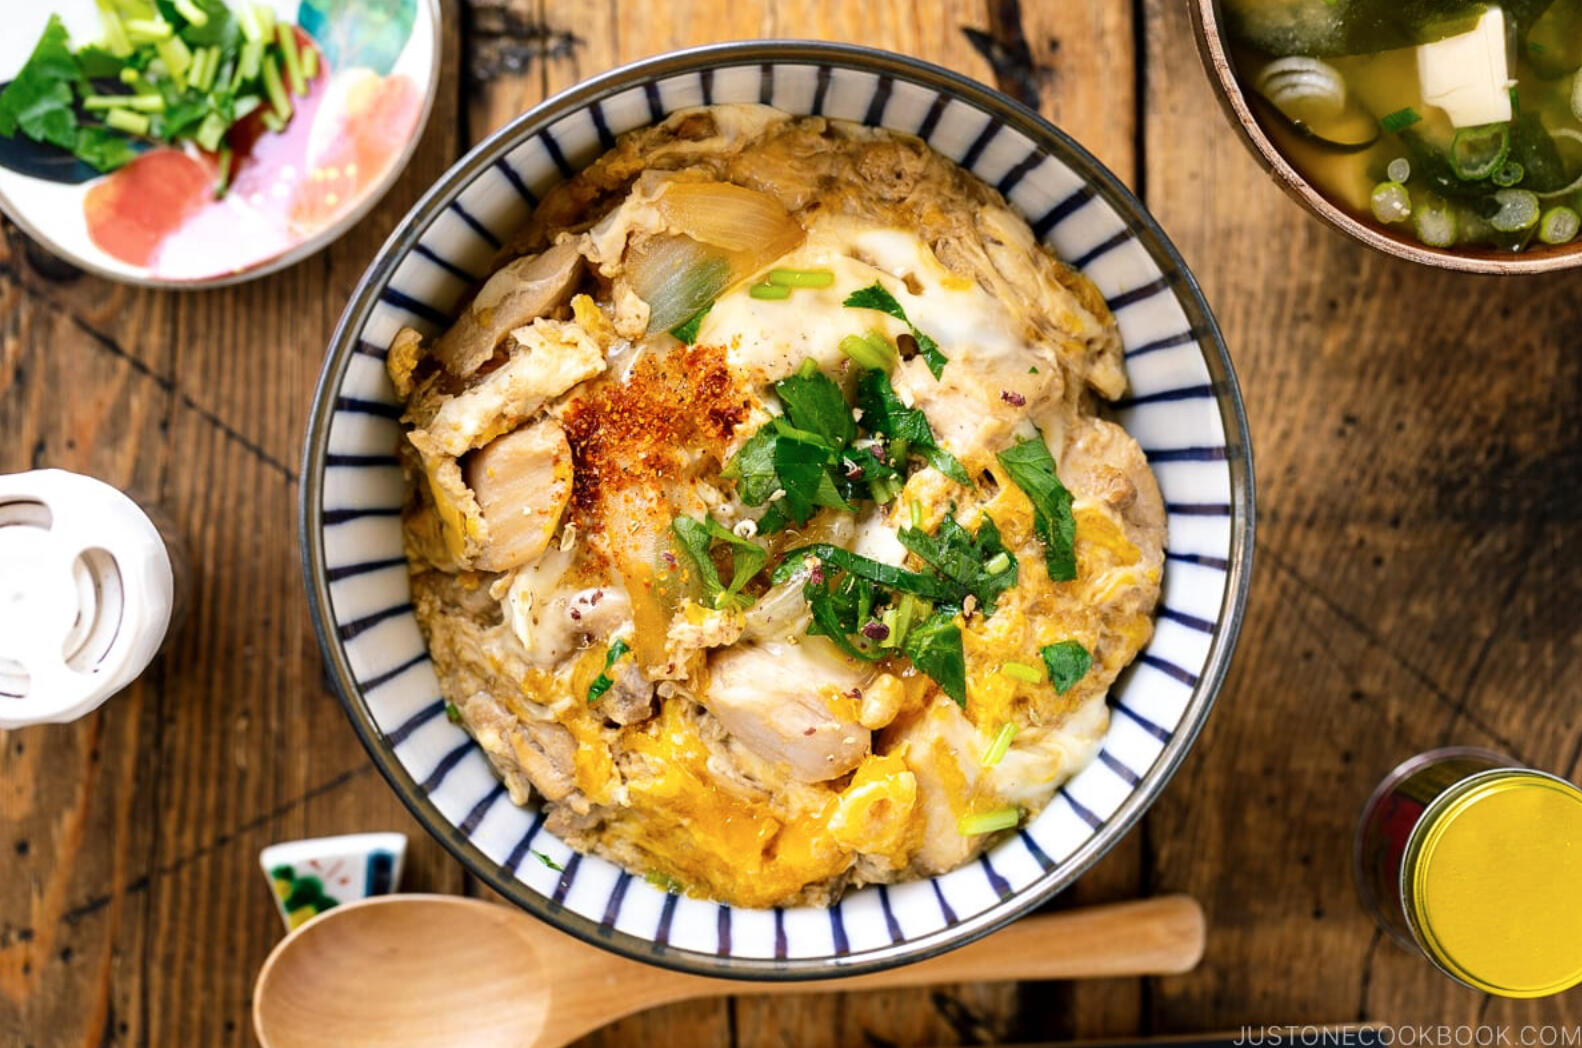
Oyakodon
Chicken and Egg Rice Bowl
You'll need
Yellow Onion
Chicken Thigh
Whole Eggs
Dashi
Steps Link
Initial Preparation
Prepare the stock by bringing water to boil and adding in the Dashi powder
Prepare Eggs
Crack eggs into a bowl. Using a pair of chopsticks, lift the egg whites to “cut“ them 5–6 times into a few smaller clumps. This will prevent the egg whites from falling into the frying pan all at once.
Do not whisk or beat the eggs together. Tip: Aim for high color contrast between the white and yellow parts of the eggs in your finished dish.
While “cutting“ the egg whites, you may have accidentally broken some of the egg yolks. That‘s okay. If the yolks haven‘t broken yet, you can poke them to gently break them, but do not blend the egg whites and yolks. The eggs should resemble a marble pattern.
Food Preparation
With the stove off, add the sliced onions to a medium frying pan (I use a well-seasoned 11” carbon steel pan) in a single layer.
Add the seasonings mixture. It should just cover the onions. If not, your frying pan is too big and you need to either increase the seasoning or use a smaller pan.
Turn on the heat to medium and bring it to a simmer. Once simmering, add the chicken on top of the onions.Make sure the onions and chicken are evenly distributed.
Once simmering again, lower the heat to medium low. Cook, uncovered, for 5 minutes or until the chicken is no longer pink and the onions are tender. Halfway through, flip the chicken. Tip: Evaporation reduces the sauce and intensifies the flavor.
We will add the eggs in two stages: Two-thirds of the eggs first, then the remaining one-third later.
Increase the heat to medium. With the cooking liquid simmering (small bubbles around the edges), drizzle two-thirds of the eggs in a circular pattern over the chicken and onions, avoiding the edges of the pan where the eggs can easily overcook. Tip:
When the eggs are still runny but just set, add the rest of the eggs to the center and around the edges of the pan. Add the mitsuba (or green onion) on top and cook on medium low until the egg is done to your liking. Tip: For the remaining one-third of the egg, try to distribute more egg yolks so the oyakodon will have a bright yellow color on top. For a good presentation, you can add a beaten extra yolk at the end.
Serve steamed rice in individual serving bowls. Spoon the cooked chicken and egg mixture onto the steamed rice and drizzle the desired amount of pan sauce on top.
Note: Only drizzle the eggs if the cooking liquid is simmering, as with Egg Drop Soup. Also, try to add more egg whites at this stage, as the whites take longer to cook than the yolks. Ideally, we want to keep the yolks soft and runny for the final presentation.
If the heat is too strong, lower the heat. If the egg is moving toward the edges of the pan, gently gather it toward the center where the heat is not as strong. Optionally, you can cover the pan if the egg whites are taking a long time to set.
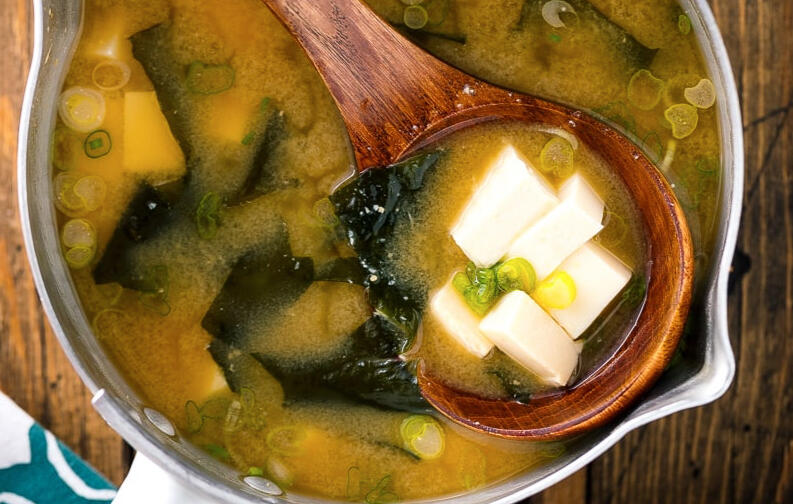
Miso Soup
You'll need
Miso
Dashi Powder
Wakame
Silken Tofu
Mushroom
Steps Link
Initial Preparation
Prepare the stock by bringing water to boil and adding in the Dashi powder
Food Preparation
Add the dashi to the saucepan. If you are using dashi from the refrigerator, bring it to a slow boil (205°F/96°C) over medium heat and turn off the heat.
Add miso. Put the miso in a ladle, slowly add the dashi into the ladle, and stir with chopsticks to dissolve completely.
Cut soft/silken tofu (kinugoshi dofu) into ½-inch (1.3 cm) cubes and add to the miso soup. Tip: Add the tofu after the miso is completely dissolved; otherwise, you might break the tofu when stirring in the miso.
Add dried wakame seaweed and the chopped green onions to the pot right before serving to keep their fresh fragrance and color. Tip: If you worry about salt intake, I recommend rehydrating the dried wakame in a separate bowl of water to get rid of the saltiness, instead of rehydrating it in the soup itself. If reheating, warm up the miso soup until it is just hot.
Note: NEVER BOIL miso soup because it loses flavor and aroma.
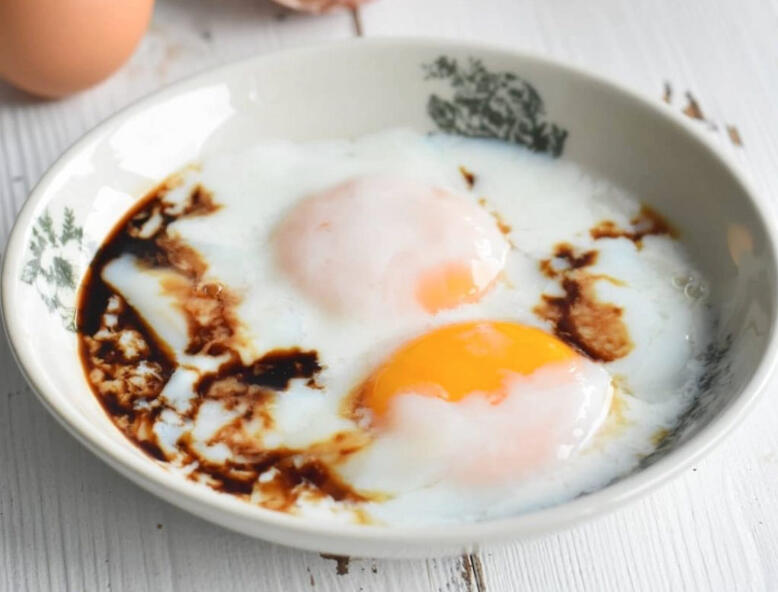
Soft Boiled Eggs
You'll need
Whole Eggs
Pot of Boiling Water
Steps
Place eggs into a bowl or mess tin
Pour Boiling water and completely cover the eggs
Leave to sit, covered for exactly 6 minutes. If you want slightly firmer yolks, cook for 6 ½–7 minutes
Serve. In the event where the egg appears to be raw, do not consume the egg. You may use it as a fried egg.
Did you know?: 1 TSP of Soy Sauce contains 14% of your daily sodium intake (291.1 mg)
You've reached the end ! 😇